
Gift for mum: Oilcloth tote tutorial
Sewing patterns
Looking for the Martha Stewart dish cloth tote tutorial? Oh, dear. It's gone, but it'll be back next week with a few changes (nothing was wrong with the directions, mind you, so you can still trust me here!). UPDATE: You can find the Martha Stewart Dish Towel Tutorial here. The directions are very similar!
If you were looking for that tutorial, take off your coat and stay awhile! Just like with the dish towel tote this bag would make a lovely thank you gift for that hard-working teacher in your life (or that hard-working grandma or mama or sister or?). Again, too, you should probably slip a little note of appreciation in with the bag because it's just a little step to making the world a better place. I love a little oilcloth and I was really intimidated by it at first. After jumping in, however, I've found it to be really fun. It leads to really striking products and has such a nice weight to it. I love toting library books around in a big, oilcloth bag.
The title
Instead of the Oilcloth Tote Tutorial we could call it the Fairly Easy Mother's Day Gift or Teacher's Gift Tote Tutorial or the Wow Your Friends and Neighbors with the Beauty of it All Tote Tutorial.
Making the bag
What you need:
- 1/3 yard of really pretty oilcloth. My favorite all-time source for beautiful oilcloth won't be carrying oilcloth for long (if you hurry you can get some great deals on the remaining oilcloth). You can just type oilcloth into Google for lots of unique options though, andSew, Mama, Sew will still carry vinyl-covered fabric which gives you some of the same benefits (water-resistant, sturdy, etc.) as oilcloth.
- 1/3 yard of coordinating fabric for the lining. My bag has fuzzy red flannel inside which I happened to have on hand and which provides a nice contrast to the oilcloth.
- thread in a coordinating color
- one package of extra-wide double-folded bias tape in a coordinating color
*This bag was made from scraps I had on hand so just happened to turn out 11" X 13" with smallish straps. If you want a bigger bag, just buy more oilcloth and use bigger dimensions when you cut. Have fun with it. Oilcloth really isn't too scary once you jump right in.
Before you begin
1. Prewash and iron the fabric for your lining and your bias tape (well, really this is the beginning!). It's optional but I tend to think it's pretty important.
2. Read through the directions all the way to the bottom. You'll start with the exterior, move onto the interior, do the straps, and then you'll put the whole thing together and do a little finishing work! You can click on any of the pictures for a better view.
3. Check out the oilcloth sewing tips from the Sew, Mama, Sew Sewing Blog. If you're really having trouble with your machine on the oilcloth, one of these tips will solve it.
The Exterior
1. If your oilcloth is all wrinkly from being folded and/or stored somewhere, take a deep breath and get ready. You're going to iron your oilcloth. You must make sure the iron is on a very, very low heat setting. It's essential. Iron on the back side of the cloth and start in a little corner to test it out. If it's too hot you'll MELT your oilcloth and that's a tough start for a bag.

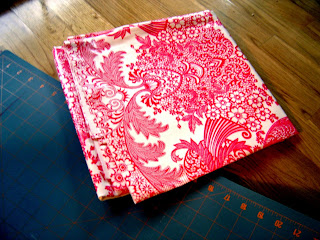
2. Fold your oilcloth in half lengthwise (long side to long side) and make sure you have a straight cut on your edges (sometimes they aren't so straight when you buy the cloth). If you bought 1/3 of a yard for this size bag, this will probably leave you with about the right dimensions (11 1/2").

3. See? Crooked! Open up your oilcloth and cut so you have one piece approximately 11 1/2" x 27". This will be your bag exterior.

4. Cut the remaining oilcloth into two long strips for the straps. Mine were 12" x 3 1/2". Set these aside for later.

5. Fold the exterior panel of oilcloth in half (short edge to short edge), right (pretty) sides facing. All you see is the back of your oilcloth. Stitch with a 1/2 inch seam allowance down the two long sides. Backstitch at the top and bottom of your seam to give it extra strength.

6. Turn the bag exterior you just made inside out so your oilcloth design is on the outside. Use a turning tool to poke the corners out so they really look like crisp corners (I use a chopstick). You're already done with the exterior!

(Like so!)
The interior

1. Cut the fabric for the lining. It should be the same dimensions as the exterior you just cut (11 1/2" x 27" for this bag). Fold the interior panel in half just as you did with the oilcloth (short side to short side) with the right (pretty!) sides facing. Then, just as you did for the exterior, stitch with a 1/2 inch seam allowance down the two long sides. Backstitch at the top and bottom of your seam to give it extra strength. Don't turn this one inside out yet! You're done with the interior.
The straps

1. Fold the strap in half (long side to long side) and then in half again. Open it up and it should look like my picture here.

2. Fold the bottom long edge to the center fold line, and then fold the top long edge to the center fold line.

It should look like this.

3. Fold this in half so you essentially have four layers of oilcloth.

4. Add your bias tape over open side and stitch down the strap. I like to use a wide zig-zag stitch for this part.

Yippee! You're really getting there...
5. Repeat strap instructions 1-4 for the other strap.

6. Iron over the bias tape. You can use a fairly warm iron if you are VERY careful not to touch the iron to the oilcloth. This is a fun part because the bias tape looks so good once you're done... Very professional!
Attaching the straps

1. Go back to the exterior of the bag. Use a ruler and measure in 3 inches over from the edge, then pin a strap so the unfinished edges of the strap and bag are facing the same direction (up). I liked how the straps looked with the inside of the strap at 3", but look at your favorite bag to see what you like. If you put the bias tape side of the strap facing the outside of the bag, make sure you do the same when you pin the other end of the strap (bias tape facing the outside). Measure in 3 inches from the other side and pin the other side of your strap in the same manner (be really careful not to twist the strap).
2. Repeat step 1 on the opposite side of the exterior of the bag with the remaining strap.

3. With a very long stitch length (baste) sew each strap to hold them in place with a 1/4 inch seam allowance.
You're really getting close now!
Sewing the bag together

1. Slip the interior over the right side of the exterior (oilcloth) of your bag. You should see the wrong side of your interior fabric. Make sure your straps are tucked inside.

The sandwich from the inside out goes oilcloth, straps, interior fabric.
2. Sew all around the top of your bag with a 1/2 inch seam allowance, leaving a 5 inch (or so) hole so you can turn the bag inside out. Be careful when you get to straps and make sure they aren't angled but, rather, are 100% perpendicular to the line you are sewing. Backstitch at the beginning and end of your seam. Then...

3. TA DA (this is the best part)! Turn your bag inside out so the straps flop out. Tuck the interior into the exterior and it should really look like a bag now. Nice work! Use a turning tool (chopstick?!) to poke the corners down.
Finishing touches

1. Smooth out the fabric where your turning hole is (you might even want to pin it once). You probably should iron the bag from the inside at this point (paying special attention to the top of the bag where the interior and exterior meet) to make it look really spiffy.
ALERT!: I've melted bits of the straps while doing this step before. You can get carried away with a hot iron because you're ironing the interior fabric, the iron touches the straps as you work your way around the bag and OOPS! Be careful with the iron. Be very, very careful. Remember: Oilcloth can melt. If this happens, by the way, you can just cut the bag right below the handles, then cut the handles off and start from the "Sewing the bag together" steps. Maybe just don't let it happen...

2. Sew with a 1/4 inch (or less) seam allowance all around the top of the bag to give it a finished look and to close the hole. Be sure to backstitch at the beginning and end of your sewing. If your machine sticks on the oilcloth, be sure to utilize theSMS sewing with oilcloth tips (tape on the presser foot, anyone?) and/or you can try sewing with the presser foot on the interior of the bag.
Cut your strings and celebrate. It's beautiful, isn't it?!
Care for your bag
I like to just wash oilcloth with a wet rag. If your bag really needs a good scrub, however, I like to hand wash it in the sink with a bit of laundry soap and cold water.
 So it really wasn't too bad, right? If you're giving the bag as a teacher gift the only thing you have left to do is to tuck that little note inside (you might as well do the same for a Mom or Grandma gift too!). This bag is more of a big-lunch-including-water-bottle-type bag, but think of the possibilities... Bigger? Smaller? The options are endless!
Source:writemamawrite.blogspot.com
If you were looking for that tutorial, take off your coat and stay awhile! Just like with the dish towel tote this bag would make a lovely thank you gift for that hard-working teacher in your life (or that hard-working grandma or mama or sister or?). Again, too, you should probably slip a little note of appreciation in with the bag because it's just a little step to making the world a better place. I love a little oilcloth and I was really intimidated by it at first. After jumping in, however, I've found it to be really fun. It leads to really striking products and has such a nice weight to it. I love toting library books around in a big, oilcloth bag.
The title
Instead of the Oilcloth Tote Tutorial we could call it the Fairly Easy Mother's Day Gift or Teacher's Gift Tote Tutorial or the Wow Your Friends and Neighbors with the Beauty of it All Tote Tutorial.
Making the bag
What you need:
- 1/3 yard of really pretty oilcloth. My favorite all-time source for beautiful oilcloth won't be carrying oilcloth for long (if you hurry you can get some great deals on the remaining oilcloth). You can just type oilcloth into Google for lots of unique options though, andSew, Mama, Sew will still carry vinyl-covered fabric which gives you some of the same benefits (water-resistant, sturdy, etc.) as oilcloth.
- 1/3 yard of coordinating fabric for the lining. My bag has fuzzy red flannel inside which I happened to have on hand and which provides a nice contrast to the oilcloth.
- thread in a coordinating color
- one package of extra-wide double-folded bias tape in a coordinating color
*This bag was made from scraps I had on hand so just happened to turn out 11" X 13" with smallish straps. If you want a bigger bag, just buy more oilcloth and use bigger dimensions when you cut. Have fun with it. Oilcloth really isn't too scary once you jump right in.
Before you begin
1. Prewash and iron the fabric for your lining and your bias tape (well, really this is the beginning!). It's optional but I tend to think it's pretty important.
2. Read through the directions all the way to the bottom. You'll start with the exterior, move onto the interior, do the straps, and then you'll put the whole thing together and do a little finishing work! You can click on any of the pictures for a better view.
3. Check out the oilcloth sewing tips from the Sew, Mama, Sew Sewing Blog. If you're really having trouble with your machine on the oilcloth, one of these tips will solve it.
The Exterior
1. If your oilcloth is all wrinkly from being folded and/or stored somewhere, take a deep breath and get ready. You're going to iron your oilcloth. You must make sure the iron is on a very, very low heat setting. It's essential. Iron on the back side of the cloth and start in a little corner to test it out. If it's too hot you'll MELT your oilcloth and that's a tough start for a bag.
2. Fold your oilcloth in half lengthwise (long side to long side) and make sure you have a straight cut on your edges (sometimes they aren't so straight when you buy the cloth). If you bought 1/3 of a yard for this size bag, this will probably leave you with about the right dimensions (11 1/2").
3. See? Crooked! Open up your oilcloth and cut so you have one piece approximately 11 1/2" x 27". This will be your bag exterior.
4. Cut the remaining oilcloth into two long strips for the straps. Mine were 12" x 3 1/2". Set these aside for later.
5. Fold the exterior panel of oilcloth in half (short edge to short edge), right (pretty) sides facing. All you see is the back of your oilcloth. Stitch with a 1/2 inch seam allowance down the two long sides. Backstitch at the top and bottom of your seam to give it extra strength.
6. Turn the bag exterior you just made inside out so your oilcloth design is on the outside. Use a turning tool to poke the corners out so they really look like crisp corners (I use a chopstick). You're already done with the exterior!
(Like so!)
The interior
1. Cut the fabric for the lining. It should be the same dimensions as the exterior you just cut (11 1/2" x 27" for this bag). Fold the interior panel in half just as you did with the oilcloth (short side to short side) with the right (pretty!) sides facing. Then, just as you did for the exterior, stitch with a 1/2 inch seam allowance down the two long sides. Backstitch at the top and bottom of your seam to give it extra strength. Don't turn this one inside out yet! You're done with the interior.
The straps
1. Fold the strap in half (long side to long side) and then in half again. Open it up and it should look like my picture here.
2. Fold the bottom long edge to the center fold line, and then fold the top long edge to the center fold line.
It should look like this.
3. Fold this in half so you essentially have four layers of oilcloth.
4. Add your bias tape over open side and stitch down the strap. I like to use a wide zig-zag stitch for this part.
Yippee! You're really getting there...
5. Repeat strap instructions 1-4 for the other strap.
6. Iron over the bias tape. You can use a fairly warm iron if you are VERY careful not to touch the iron to the oilcloth. This is a fun part because the bias tape looks so good once you're done... Very professional!
Attaching the straps
1. Go back to the exterior of the bag. Use a ruler and measure in 3 inches over from the edge, then pin a strap so the unfinished edges of the strap and bag are facing the same direction (up). I liked how the straps looked with the inside of the strap at 3", but look at your favorite bag to see what you like. If you put the bias tape side of the strap facing the outside of the bag, make sure you do the same when you pin the other end of the strap (bias tape facing the outside). Measure in 3 inches from the other side and pin the other side of your strap in the same manner (be really careful not to twist the strap).
2. Repeat step 1 on the opposite side of the exterior of the bag with the remaining strap.
3. With a very long stitch length (baste) sew each strap to hold them in place with a 1/4 inch seam allowance.
You're really getting close now!
Sewing the bag together
1. Slip the interior over the right side of the exterior (oilcloth) of your bag. You should see the wrong side of your interior fabric. Make sure your straps are tucked inside.
The sandwich from the inside out goes oilcloth, straps, interior fabric.
2. Sew all around the top of your bag with a 1/2 inch seam allowance, leaving a 5 inch (or so) hole so you can turn the bag inside out. Be careful when you get to straps and make sure they aren't angled but, rather, are 100% perpendicular to the line you are sewing. Backstitch at the beginning and end of your seam. Then...
3. TA DA (this is the best part)! Turn your bag inside out so the straps flop out. Tuck the interior into the exterior and it should really look like a bag now. Nice work! Use a turning tool (chopstick?!) to poke the corners down.
Finishing touches
1. Smooth out the fabric where your turning hole is (you might even want to pin it once). You probably should iron the bag from the inside at this point (paying special attention to the top of the bag where the interior and exterior meet) to make it look really spiffy.
ALERT!: I've melted bits of the straps while doing this step before. You can get carried away with a hot iron because you're ironing the interior fabric, the iron touches the straps as you work your way around the bag and OOPS! Be careful with the iron. Be very, very careful. Remember: Oilcloth can melt. If this happens, by the way, you can just cut the bag right below the handles, then cut the handles off and start from the "Sewing the bag together" steps. Maybe just don't let it happen...
2. Sew with a 1/4 inch (or less) seam allowance all around the top of the bag to give it a finished look and to close the hole. Be sure to backstitch at the beginning and end of your sewing. If your machine sticks on the oilcloth, be sure to utilize theSMS sewing with oilcloth tips (tape on the presser foot, anyone?) and/or you can try sewing with the presser foot on the interior of the bag.
Cut your strings and celebrate. It's beautiful, isn't it?!
Care for your bag
I like to just wash oilcloth with a wet rag. If your bag really needs a good scrub, however, I like to hand wash it in the sink with a bit of laundry soap and cold water.
So it really wasn't too bad, right? If you're giving the bag as a teacher gift the only thing you have left to do is to tuck that little note inside (you might as well do the same for a Mom or Grandma gift too!). This bag is more of a big-lunch-including-water-bottle-type bag, but think of the possibilities... Bigger? Smaller? The options are endless!Source:writemamawrite.blogspot.com


0 nhận xét:
Đăng nhận xét