Hiển thị các bài đăng có nhãn bag. Hiển thị tất cả bài đăng

Thứ Ba, 27 tháng 9, 2011

Paper crafts for kids: Paper Purse tutorial

Paper Purse  Paper Purse
In this class I will show you how simple it is to turn a single sheet of patterned paper into an adorable little purse!  These purses make cute accents to your scrap area and can also be used as gift or party favor bags, notecard holders, etc.
 
Example using Chatterbox paper
Variations to try:  You can use a sheet of 6x6 paper instead of 12x12 to make a mini purse. 
You can also use two patterned papers, as you'll see I did in the example.  Simply substitute the second paper for the 6x4" section to make the sides. 
You will need the following supplies:

  • one 12 x 12" double sided patterned paper or cardstock
  • paper trimmer
  • scoring tool, such as a bone folder
  • adhesive
  • pencil
  • optional decorations: brads, faux flowers, ribbon, buckles, charms
Directions:
  • Cut a 1" strip from the 12x12 sheet and set aside. This will be the strap.
  • Cut a 7x11" piece. Score on the 11" side at 4 1/2" and 6 1/2" on the underside of the patterned paper.  
  • On the 7" side, make a small mark at 1 1/4" and 5 3/4" on both sides.   the mark will not be noticeable once the purse is assembled
  • Score paper at an angle from one end of the center score line to the nearest small mark. Repeat for each corner. Set aside.   the paper will resemble a diamond shape once you fold each of the angles upward
  • Cut a 6x4" piece from the remaining paper.  On the 4" side, score 3/4 from one end - this will be the bottom.  Score 5/8 from the other end - this will be the top.  Cut this piece in half to make two 6x2" pieces.   Notice in the image below how the bottom section folds under and the top section fold over.   all these measurements make it sound difficult but hang in there, you're nearly done
  • Adhere the bottom part of the 6x2" piece to the 2" strip down the center of the 7x11" piece.  
  • Fold up the sides of the purse and the angled sides will overlap.  Fold down the top part of the 6x2" piece overtop and adhere.  Repeat for the other side.   your purse is taking shape now
  • Position the strap as desired and adhere or secure with brads.  You will have a square of patterned paper leftover which you could use to accent your purse.  Your purse is now finished - decorate as desired using faux flowers, ribbons, buckles, charms, etc. 


Paper PursePaper Purse
Paper crafts for kids: Paper Purse tutorial

Thứ Hai, 26 tháng 9, 2011

Refashion for women: Clutch bag makeover


Seeing as blogger rudely deleted my post from yesterday of my clutch bag and didn't return it to my blog as their maintenance page informed me it would I'm having to repost it again!

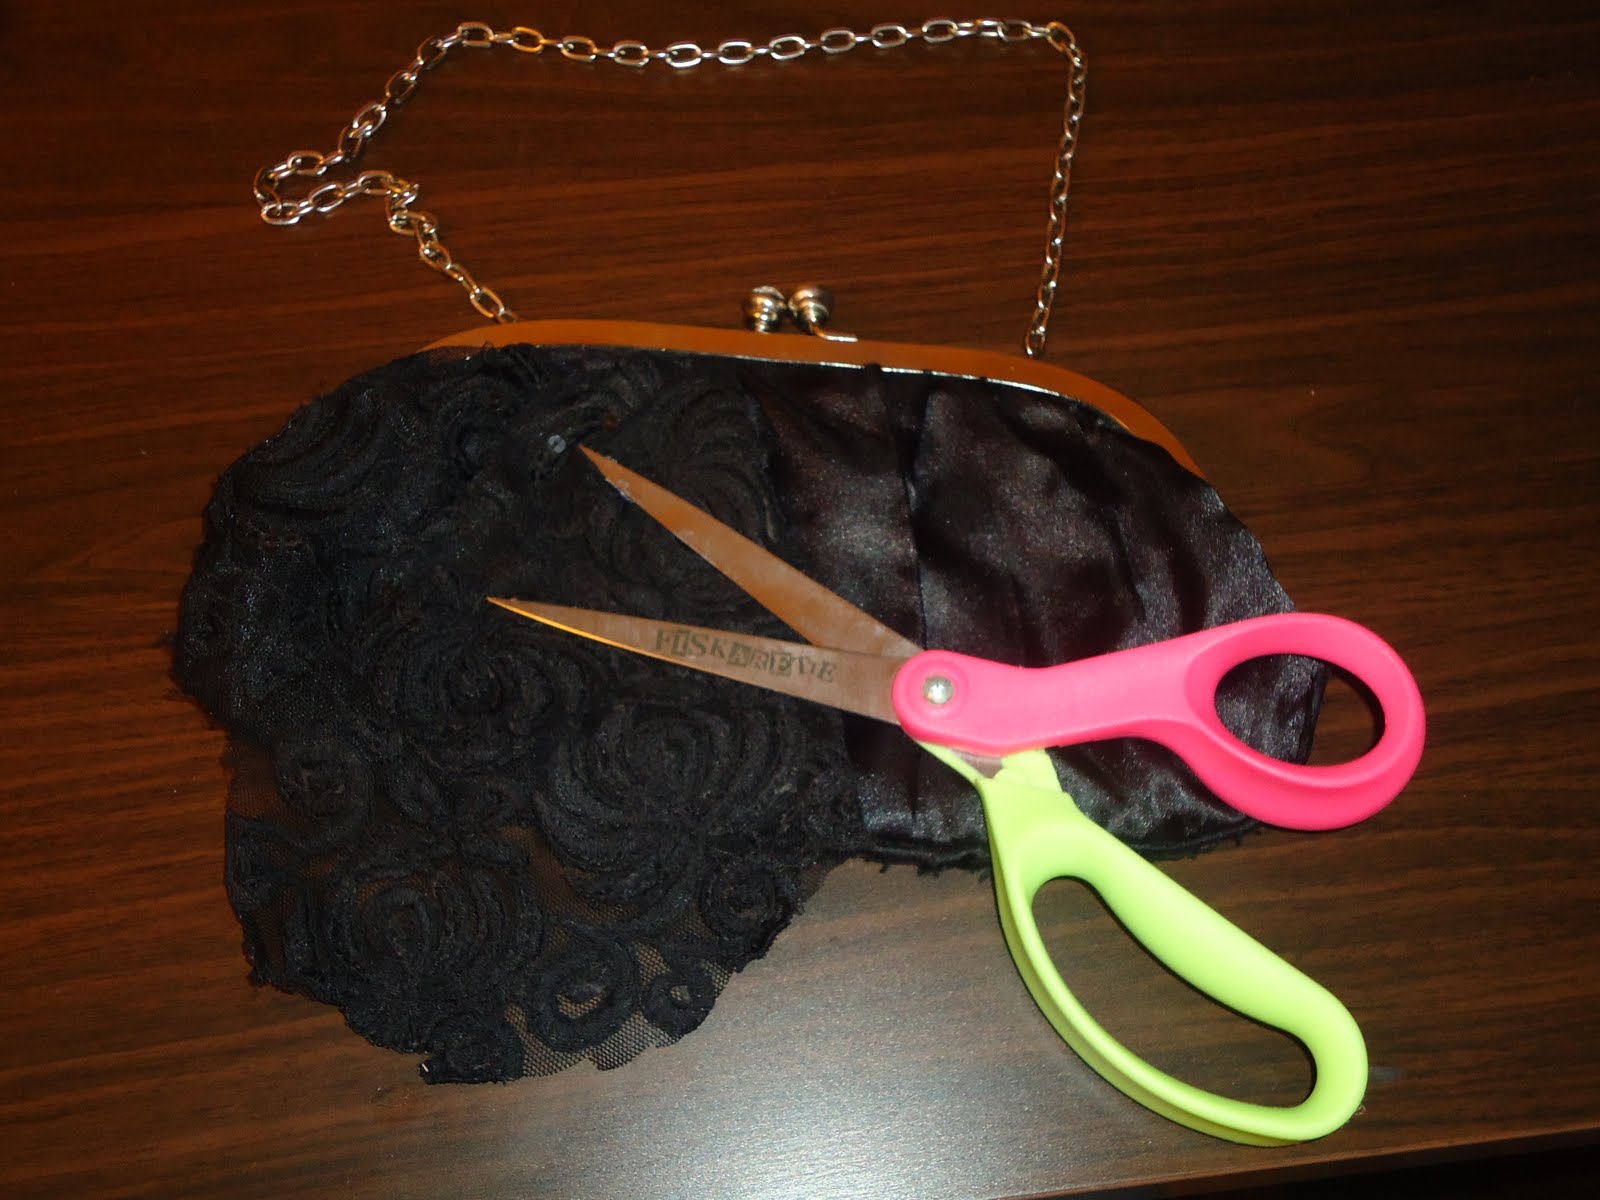
So a small dilemma happened when I last wanted a black bag for night out.. my little black clutch bag looked sad, worn and well, hideous to be honest... in the end I changed my whole outift as I didn't want to be seen with such an awful looking bag. The other day I had a brainwave and thought I could make it over as it's only the outer fabric that's shabby.

And after a little bit of thinking and throwing fabrics out of the drawer this is what I came up with....
Refashion for women: Clutch bag makeover  
If you want have a go at this too then you'll need:
  • a clutch bag
  • complementing colour fabric
  • fabric flower
  • 22 x 6mm beads
  • glue gun
  • scissors1. First I cut the lacy fabric off (this was the bit that was amking my bag look awful so it had to go). The fabric underneath is great and is the same as the fabric I used for the leaves to cover it.
    2. Take your fabric and cut it into little pieces, one for every leaf. Make a small pile of fabric, draw a leaf on the top piece and cut it out, repeat till you have enough to cover the bag. (I needed 36 to cover my bag)
    3. Start by glue gunning the first leaf at the bottom of the metal frame.

    4. Continuing glue gunning the leaves along the bottom of the bag.
    5. Continue by sticking leaves in layers that just about cover the top of the leaves on the layer beneath.
    7. Glue the top layer as close to the metal frame as possible. Don't worry if there's a little glue overspill as the beads will cover this.
    8. Start glueing the beads along the lower edge of the metal frame, removing excess glue before it dries.
    9. Continue glueing beads on till there's enough along the frame to mirror the starting point on the opposite end. 10. Add the fabric flower as an embellishment and then the bag is finished!
    Looks 100 times better than it did when I started and now I'm more than happy to take it out with me :) If the fabric flower isn't your taste then skip the last step as it still looks good without it, or perhaps add a different embellishment to suit the outfit you want it to go with.

Thứ Tư, 14 tháng 9, 2011

nice cover for notebooks more crafts ideas


Textiles
Very nice cover for notebooks, wallets, cheholchiki for phone, key chains, made ​​of felt from the master nick Cartellina 

(525x700, 112Kb)

(567x480, 143Kb)

(455x640, 186Kb)

(568x640, 345Kb)

(386x640, 179Kb)

(547x640, 257Kb)

(640x587, 277Kb)

(640x486, 185Kb)

(577x640, 316Kb)

(452x640, 162Kb)

(450x605, 26Kb)

Orla Fancy Face: unique purses

fancy faeries

IMG_3717a
introducing fancy faerie faces
IMG_3712a
this free spirited fancy face wears flowers in her hair and spends long days dreaming of faraway places. she loves to wander wherever you may roam and will carry all of your girly goodies while you're away from home.
her head dress is made from a tiny vine of leaves sprouting with colorful felt blooms. her pretty little face is made of hand cut cotton applique and delicate hand embroidered eyelashes.
Image of Orla Fancy Face
a gorgeous one of a kind accessory to dangle from your wrist while you're out on the town...or swing from a fancy hook in your favorite room while you catche a wink.
5" x 7"
Image of Orla Fancy Face
Source:shop.lorimarie.com

Thứ Bảy, 10 tháng 9, 2011

Gift presents for women: Easy Placemat Envelope Clutch tutorial

Placemat Envelope Clutch

Sewing patterns
You know you DIY too much when you look at a placemat and think of accessories...not food, tables or eating.


Supplies:

- Ruler
- Sharpie/marker
- Jewelry pliers
- Button of your choice. You can also use an old earring, pendant, etc.
- Wire cutters (depending on the button you're using)
- Magnetic purse closures (available in the sewing section of the craft store)
- Scissors
- E6000/super glue
- Flat button, or a button with a shank on the back (to be removed)
- Placemat
- Thick fabric, like vinyl or pleather. About 12x12 inches.
- Thiner fabric, like cotton or jersey. About 12x12 inches.
- Sewing machine & coordinating thread (not shown)
- Denim needle (for your sewing machine)
- Sewing pins
- Scrap paper
- White chalk or charcoal (might be useful)

I was going to use an elephant button, but changed my mind for a flat gold button that'd be easier to work with. Reason #32487648162 DIY is great: you can change your mind whenever you want.

For my additional fabrics, I used black pleather from Mood and black jersey from an old t-shirt.

Obviously, the final look of your clutch will depend on what kind of placemat you find. I'm sure Canada isn't the only place to find cool looking placemats, so try checking out stores like Home Goods, TJ Maxx, and Target. Your local dollar store is always worth a shot, though. Just make sure the placemat is thin enough to be sewn through two layers.

Closeup of the magnetic purse closures. They have prongs that can be bent in with pliers, to secure to fabric.


1) Fold the placemat in half, front sides facing each other. Draw a line on each side; you'll be sewing down these lines later on.


2) Place your placemat on a piece of paper. Find the midpoint, draw a line, and connect the top of this line to create a triangle like above. Make sure the "bottom" of the triangle has a good inch or so extra.


3) Cut out your pattern.


4) Place the pattern on one of the pieces of fabric, and measure an inch extra all around.


5) Cut out.


6) Repeat with the other piece of fabric.


7) Front sides facing each other, sew the two pieces together - EXCEPT for the bottom  (not at the very edge, but right below the one inch marks. I didn't take a picture of this, so sorry!).

Flip it right side out, fold in the open ends of the bottom, and pin together. Sew this shut.


8) Pin the flap to one side of the placemat.


9) Sew the flap to the placemat.

Fold the placemat in half, right sides facing each other (just like you did in Step 1). Sew along those marker lines you drew, then turn the entire thing right side out.


10) Pierce two holes in the flap of the clutch. I'd recommend placing this on an old magazine, so as to not damage your table/desk/etc. Insert the prongs of one end of the magnetic purse closure, and bend in with pliers.

Repeat this on the placemat side, for the other end of the magnetic closure. Make sure they'll line up before making any holes (white charcoal or chalk might come into handy for marking lines to guide you when piercing holes).


11) If needed, remove the back of the button.


12) Glue onto flap, covering up the prongs of the magnetic closure. Let dry.


 Source: studs-and-pearls.com

Labels

Accessories Adult English afghan afghan stitch AGULHAS Amigurumi amirugumi Ảnh anniversary applique Art artist artist trading card Árvore de Natal em croche atc autumn basket award Ẩm thực baby crochet Baby Dress baby knitting Baby learn back to school bag Bags BAKTUS Ballet Bun Cover balloons BARRADOS Bead Beads Bear Ear Hat BEBÊS belts Berry bird birdhouse birthday card blanket blog candy BLUSAS BOINA BOLEROS BOLSAS books booties BORBOLETAS bouquet bows boxes boy card bracelet breast cancer bridal shower bunny Búp bê butterfly CACHECOL CACHECOLAR cake calendar candles candy Candy Cane capilano suspension bridge card card drive card making Cards cards for kids carving carving fruit carving fruits CASACO INFANTI CASACOS CASAQUINHO EM CROCHE CASAQUINHO EM TRICO CASAQUINHO PARA BEBÊ Cắm hoa Cắt may CHAPEU cheerleader childrens crafts christmas quilling clay COLAR COLAR DE FLORES COLETE coloring copyright CORDÃO corned beef CORUJUINHAS crafts CROCHE COM SAQUINHOS PLASTICOS CROCHE IRLANDES crochet Crochet Geek crochet pattern cross cross stitch Curtain cutting paper daisy DECORAÇAO Detail crochet - Móc chi tiết Dicionário de Trico - Inglês/Portugues Doily Doll Dolls dress Đan len earring easter easter card ECHARPE embellishment Embroidery ENXOVAL PARA BEBÉ ESTOLAS explosion gift card holder FAIXA PARA CABELOS fashion fathers day Felt filigrana Floral crochet - Móc hoa FLORES flower flower arrangement flowers crochet Folding paper FOLHAS food food decor frances shilliday free atc pattern free easter pattern FREE FORM free gift free instructions free pattern free quilling instructions free quilling pattern free rice free spreuer patterns fringed flower frustration fun facts Funny Galaxy Stitch Gang tay - Tất garden Gấp giấy Gấp hộp Gấp khăn - Trang trí món ăn gel grips Giầy - Dép gift gift card holder Gifts giveaway glass gloves Gói quà - gấp nơ golf GOLINHAS Google+ GORRO Gối cho bé graduation card GRÁFICOS Granny Square grape roll Hair hair clip halloween happy birthday hat hats heart Hexagon history holiday craft holiday crafts home and garden Hook Itunes jewelery jewelry Kết hạt Khăn - Mũ kirigami kite fold Knit knitting knitting pattern knot ladybug Làm + Trang trí bánh Làm đẹp Làm đồ chơi làm đồ chơi từ gỗ Làm hoa giấy Làm hoa nhựa Làm hoa vải Làm thiệp LEAVES lions gate bridge Log Cabin Square Love luck of the Irish LUMINÁRIAS LUVAS LUVINHAS PARA BEBÊ Magazine magnolia stamp make it monday make up making flower making flowers Making toys mandala Manta MANTA PARA BEBÊ MANTA PARA SOFÁ Mẫu móc Mẫu đan chi tiết Mẫu móc mẫu móc chi tiết Mẫu móc hoa MEUS MOMENTOS MEUS TRABALHOS Michelle Ewart mittens Móc khăn trải bàn Mothers Day motif Multiples myths Nail art naqg necklace needle tool Nghệ thuật Nghệ thuật cắt giấy Nhà đẹp one world one heart Origami owl owoh Pachwork painting Painting - Vẽ PANTUFAS PAP Paper paper filigree paper quilling paper tag paper weight Patchwork patriotic peg PELERINE photograph Phông nền làm ảnh pictures Pillows pink artist pink artist parade of squares pink dogwood pink flamingo pinwheel plastic POLAINA poncho Popcorn puff stitch pumpkin pumpkin cap QUADRADO quilled angel quilled c-scroll quilled coil heart quilled cross quilled double scroll quilled dress quilled eye shape quilled flower girl dress quilled flowers quilled heart quilled heart scroll quilled loose coil quilled loose scroll quilled marquis shape quilled open coil quilled open heart quilled ornament quilled palm tree quilled raindrop shape quilled s-scroll quilled snowflake quilled snowman quilled spiral shape quilled teardrop shape quilled turkey quilled valentine quilling quilling coil shapes quilling double scroll quilling instructions quilling paper quilling pattern quilling shapes quilling strips quilling supplies quilling tools Quilt RECEITA RECEITA CULINÁRIA RECEITA DE PONTOS recycle recycling RENDA DE PELO DE CABRA repair work ribbon rings rugs SACOLAS SAIAS DE CROCHE SANDÁLIAS EM CROCHÊ SAPATINHOS SAPATINHOS PARA BEBÊ Scarf scarves Scarves - Khăn scrapbooking scroll shapes sewing shawls shoes and sandals Singing skirt slippers slotted tool small kite fold snood Snowflake soap socks spiral rose spreuer spreuer flower spring SQUARE st patricks day Strawberry SUÉTER summer tag sweater Swiffer Sweeper Cover TABELAS DE MEDIDAS DE TRICO E CROCHE tablecloths tagged TAPETES. RECEITA tarjetas tea bag folding tea bag folding history teabag folding teabag folding history TENIS PARA BEBÊ Tết dây Thank you thanks thanksgiving quilling Thêu Tỉa hoa quả tight coil tight roll tip tips TOALHAS Tóc đẹp TOUCAS TOUCAS PARA BEBÊ Trang điểm Trang trí TRICO Túi xinh TÚNICA tunisian turkey Tutorial Tutorial video underwear Valentine's day valentines crafts valentines heart vancouver Video VÍDEO Video cắt may Video dạy móc video tutorial weaving wedding wedding dress winners winter quilling wood wreath XALE xerox lets say thanks YouTube