I purchased my onion holder several months ago and have not used it. Since this is a month of trying new things, I thought it was time that I attempted to do some Spreuer work.
Before we can begin with projects, this post will help you with the basic instructions.
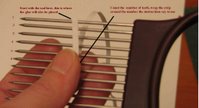
Begin with your onion holder tool. You will see that each tool could have a different number of teeth. The tool I have has 15 teeth, as shown.

To make your spreuer item, follow these basic steps, the pictures will help:
- Take your strip and with the loose end at the 1st tooth, count down to the number specified in the instructions.
- With Spreuer, the instructions will provide you with a list of numbers.
- These numbers correspond to the teeth on your tool.
- When you get to the number you wrap the strip around that tooth.
- As you come around the back and over the top, place a dab of glue.
- If you need more than one strip, I do not glue the 2 together when I start. I wait to see where the strip will end and then cut and glue so that I keep a front and back where all my glue will be.
- Keep winding until you complete the project.
- When you are done, glue the final wrapped strip in place and slide it off the tool.
- Arrange your spreuer items accordingly.
With Spreuer you can make Crosses, Angels, Flowers, Trees... stay tuned to see what we will make :-)
This will get you started. The next few projects will show you some examples.
Enjoy!
Copyright Antonella DeFalco
Technorati Tags: quilling, paper filigree, filigrana, free quilling pattern, christmas quilling, free pattern, naqg, childrens crafts, spreuer instructions


0 nhận xét:
Đăng nhận xét